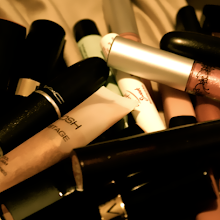

Pictured above:
- Sally Hansen Maximum Strength Polish Remover (regular strength)
- Buffing block with 4 strengths
- Burt's Bees Lemon Cuticle Butter
- Glass nail file
- Metal nail pick/cuticle pusher
- Nail clippers
- Buffing brush
- Sally Hansen Instant Cuticle Remover
- Cotton pads
Step 1: Remove existing nail polish using cotton pads and nail polish remover.
Step 2: Apply cuticle remover gel. This gel softens the cuticles and makes it easier to remove excess skin and push back the cuticles. Yes, I know my nails are a little yellow.

Step 3: Using a metal instrument (or a toothpick/orangewood stick), gently scrape at excess skin and remove the gel after letting it set for approximately 1 minute (I know the bottle says something like 15 seconds but it does no harm to let it sit a little bit longer). Gently push back the cuticles and wipe the excess gel away with a cotton pad.
Step 4: Use the gentlest side of the buffing block to smooth the surface of the nails.
*** Not pictured: after this step, I applied cuticle balm. I let it sink in then buffed my nails
again to remove any oil.

Step 5: Use a glass file to shape the nails. I personally prefer mine in a 'squoval' shape.
Step 6: Apply your preferred base coat. I usually use Barielle Manicure Extender, however I just ran out and had this cheap stuff from a nail set on hand.

Step 7: Apply your desired colour. I'm using Essie's Bordeaux. It took 2 coats to reach full capacity. Make sure to allow the colour to dry between coats and before applying top coat. I've had a lot of practice so my hand is very steady; if you get any polish on the skin, you may easily remove it with a Q-Tip dipped in polish remover.
Step 8: Apply your top coat. I'm using Sally Hansen Insta-Dri. I prefer it over Seche Vite, which I used to use, because it doesn't give me a headache. After they're dry you may apply cuticle oil like CND's Solar Oil.

Quick tips:
Filing
- Using a glass file is gentler on nails. Glass files are generally more expensive but they last a longer time and do not wear out like cardboard files. I find metal files a bit too harsh.
- File in only one direction to minimize nail peeling.
- Filing with your nail polish on is useful if the whites of your nails are uneven because it is easier to balance out the length (just make sure it's on a old manicure that you're replacing!)
Painting
- Paint in large strokes fairly quickly so the polish doesn't dry and buckle up.
- Clean up the edge of the cuticle line with an angled eyeliner brush dipped in acetone for precision.
- Bubbles in your manicure may be from humidity, wind, AC, or too thick of coats. Minimize bubbling by painting in an enclosed, cool room with thinner coats. Also - don't shake polish, roll it between the palms of your hands to mix.
- Quick dry topcoats are the best to use. Don't bother with traditional natural drying ones as it is much easier to smudge your manicure. However, sometimes you can save a smudge by licking it gently as it's a bit dry (yuck, I know - but it works).
I hope this helped a bit, good luck with your manicure!
No comments:
Post a Comment